Discover the simplicity of preparing a classic 6 oz Jello dessert, perfect for any occasion! This easy-to-follow guide covers preparation basics, ensuring a flawless and delicious result every time.
The Appeal of Jello: A Classic Dessert
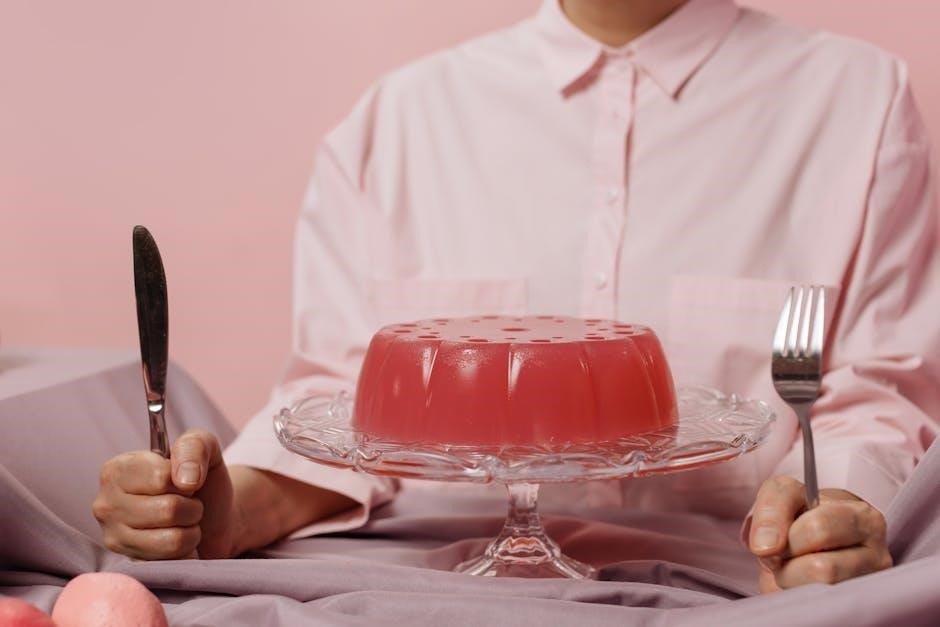
Jello holds a cherished place in dessert history, evoking nostalgic memories for many. Its vibrant colors and playful wobble instantly bring a sense of fun and lightheartedness to any table. This classic treat is remarkably versatile, easily adapting to various flavors and presentations.
From simple childhood snacks to elegant party displays, Jello consistently delivers a delightful experience. The ease of preparation is a significant draw, making it a go-to option for both novice and experienced cooks. It’s a quick and easy dessert to make, using powdered jello or even making it from scratch!
Why Choose a 6 oz Package?
Jello boxes are conveniently available in two sizes: smaller 3 oz packages and larger 6 oz options. Opting for the 6 oz package provides a greater yield, making it ideal for gatherings, potlucks, or when you simply desire a larger portion of this delightful dessert.
The larger size offers cost-effectiveness, delivering more Jello per purchase. It’s particularly beneficial when creating Jello shots, as it reduces the need for multiple smaller boxes. Whether you’re preparing a family treat or a festive party snack, the 6 oz package offers both convenience and value.

Understanding Jello Ingredients
Jell-O is simply gelatin mixed with flavoring; boxes come in various flavors and sizes, with 6 oz being a popular choice for larger servings.
Jello Mix Varieties: Flavors and Types
Jello boasts an extensive range of flavors, catering to diverse palates. Classic options like strawberry, raspberry, and orange remain perennial favorites, while more adventurous choices such as lime, cherry, and grape offer exciting alternatives. Beyond traditional fruit flavors, you’ll find sugar-free varieties for health-conscious individuals, and even limited-edition seasonal flavors that add a touch of novelty.
The types of Jello mixes also vary. Standard Jello sets firmly, while “Jello Pudding” mixes create a creamier, more pudding-like consistency. Some mixes are specifically designed for making Jello shots, often with bolder flavors. Understanding these distinctions allows you to select the perfect Jello mix for your desired dessert or treat, ensuring a delightful outcome every time.
Distinguishing Between 3 oz and 6 oz Jello Boxes
Jello boxes come in two primary sizes: the smaller 3-ounce box and the larger 6-ounce box. The key difference lies in the quantity of gelatin mix contained within. A 6-ounce box effectively contains double the amount of mix as its 3-ounce counterpart, making it ideal for larger batches or recipes requiring more gelatin.
When choosing, consider your needs. A 3-ounce box is sufficient for a standard-sized dessert serving several people, while the 6-ounce box is better suited for parties, layered desserts, or Jello shots. Both sizes are available in a wide variety of flavors, so the choice primarily depends on the desired volume.
The Role of Gelatin: What is it?
Gelatin is the fundamental ingredient responsible for Jello’s signature wobble and set. It’s a protein derived from collagen, typically sourced from animal by-products. This colorless, flavorless powder dissolves in hot liquid, creating a unique texture when cooled. Essentially, gelatin provides the structural framework that transforms a liquid mixture into a semi-solid dessert.
Without gelatin, Jello wouldn’t exist! It’s what allows the flavored liquid to solidify, holding its shape. While some may opt for alternatives, gelatin remains the traditional and most effective gelling agent for achieving that classic Jello consistency. It’s a key component in both store-bought mixes and homemade versions.
Essential Equipment for Jello Making
Preparing 6 oz Jello requires basic kitchen tools: measuring cups and spoons, mixing bowls, and containers for setting. Simple steps with available equipment!
Measuring Cups and Spoons
Accurate measurement is crucial for successful Jello preparation, especially when working with a 6 oz package. Utilizing both liquid measuring cups and dry measuring cups ensures precision. For the boiling and cold water, a liquid measuring cup is ideal, guaranteeing the correct volume.
When it comes to the Jello mix itself, dry measuring cups are essential for an accurate portion. Don’t forget measuring spoons! They are vital for any potential additions like flavorings or, if making Jello shots, alcohol. Precise measurements guarantee the Jello sets properly and tastes delightful every time.
Mixing Bowls: Size and Material
Selecting the right mixing bowl is key for effortlessly preparing 6 oz Jello. A medium-sized bowl, approximately 2-3 quart capacity, works best, providing ample space for stirring without splashing. Material-wise, glass or stainless steel are excellent choices.
Glass bowls allow you to easily monitor the dissolving process, while stainless steel is durable and doesn’t retain odors. Avoid using plastic bowls, as they can sometimes absorb flavors. Ensure the bowl is clean and dry before starting, guaranteeing a pure Jello flavor and perfect consistency.
Containers for Setting: Molds and Dishes

Choosing the right container is crucial for beautifully setting your 6 oz Jello. Simple glass dishes or individual serving cups work wonderfully for a classic presentation. For a more festive touch, consider using decorative molds! Silicone molds are particularly convenient, allowing for easy Jello release.
Regardless of your choice, ensure the container is clean and can withstand refrigeration temperatures. Lightly greasing the mold with a neutral oil can further aid in unmolding. Proper container selection contributes to both the appearance and enjoyment of your Jello dessert.
Step-by-Step Instructions: Basic 6 oz Jello Recipe
Preparing 6 oz Jello starts by boiling water and carefully measuring ingredients for perfect preparation every time, easily at home with simple steps!
Boiling Water: The First Step
The initial stage in crafting a delightful 6 oz Jello involves bringing one cup of water to a rolling boil. This crucial step isn’t merely about heating the water; it’s about utilizing the heat to efficiently dissolve the Jello mix. A full boil ensures the gelatin granules break down completely, preventing a grainy texture in the final dessert.
Carefully pour the boiling water into a mixing bowl – glass or stainless steel are ideal. Remember safety first! Once the water is added, proceed immediately to the next step, as the water will begin to cool, potentially hindering the Jello’s ability to set properly. This quick action is key to a smooth, vibrant Jello.
Dissolving the Jello Mix
With the boiling water prepared, it’s time to introduce the 6 oz Jello mix. Gradually sprinkle the entire contents of the Jello box into the hot water, whisking continuously. This prevents clumping and ensures even distribution of the gelatin and flavoring. Continue whisking vigorously for at least two minutes, or until you observe no visible granules remaining.
The mixture will initially appear cloudy, but persistent whisking will yield a clear, vibrant liquid. Complete dissolution is paramount; undissolved granules will result in a textured, less-than-ideal Jello. Patience is key here – a fully dissolved mix is the foundation of a perfect Jello.
Adding Cold Water and Mixing
Once the Jello mix is completely dissolved in the boiling water, it’s time to introduce the cold water. Measure out one cup of cold water and gently pour it into the Jello mixture. Stir thoroughly to combine, ensuring the cold water is evenly distributed throughout. This step lowers the temperature, initiating the setting process.
Continue stirring for another minute or so. You’ll notice the mixture begins to thicken slightly. Avoid vigorous stirring at this stage, as it can disrupt the gelatin structure. The goal is simply to ensure complete incorporation of the cold water, creating a homogenous Jello base ready for chilling.

Setting and Chilling the Jello
Carefully pour the Jello mixture into your chosen containers and refrigerate for the appropriate time. Chilling allows the gelatin to set, creating that classic Jello texture!
Pouring into Containers
Once the Jello mixture is thoroughly combined and slightly cooled, it’s time to transfer it into your desired serving vessels. You have a delightful range of options available, from individual serving dishes to elaborate molds that create fun and festive shapes.
Ensure a smooth and even distribution by gently pouring the liquid Jello, avoiding any splashes or spills. If using molds, lightly grease them with a neutral oil to facilitate easy removal once the Jello has fully set. This prevents sticking and ensures a clean release of your wobbly creation.
Remember to leave a small space at the top of each container, as the Jello will expand slightly during the chilling process.
Refrigeration Time: How Long to Chill
Achieving the perfect Jello wobble requires adequate chilling time. Generally, a 6 oz package of Jello needs at least 4 hours to fully set in the refrigerator. However, for optimal firmness and a truly delightful texture, extending the chilling period to 6-8 hours is highly recommended;
Avoid the temptation to check on it too frequently, as disturbing the setting process can lead to an uneven consistency. Patience is key! The Jello should be firm to the touch, yet still retain a gentle jiggle.
Remember that colder refrigerator temperatures will expedite the setting process.
Checking for Proper Setting
To determine if your 6 oz Jello has set correctly, gently tilt the container. A properly set Jello will hold its shape and jiggle as a single unit, rather than sloshing around like a liquid. Avoid vigorously shaking or moving the container, as this could disrupt the delicate structure.
If the Jello still appears too soft after the recommended chilling time, return it to the refrigerator for another hour or two. Remember, setting times can vary based on refrigerator temperature and humidity.
A slight firmness to the touch is a good indicator of success!

Jello Shots: A Fun Variation
Jello shots are a fun and colorful way to enjoy a party! They are easy to make and can be customized to suit any taste preference.
Jello Shot Recipe Using a 6 oz Package
For a delightful Jello shot experience, begin with one 6 oz package of your preferred Jello flavor. Combine this with one cup of boiling water, stirring diligently until the Jello powder is completely dissolved – ensuring no granules remain. Following this, incorporate one cup of cold water, mixing thoroughly to create a homogenous blend.
Next, gently pour the mixture into individual shot glasses or a larger dish for portioning later. Refrigerate for at least four hours, or preferably overnight, to allow the Jello to fully set and achieve the desired firm consistency. For an adult twist, add 1/2 to 3/4 cup of vodka or other desired spirit after the boiling water step, before adding the cold water.
Current Trends in Jello Shots
Jello shots are experiencing a vibrant resurgence, evolving beyond simple fruit flavors. Layered shots, featuring contrasting colors and flavors, are incredibly popular, creating visually stunning and tasty treats. Infusions with unique spirits – think tequila with mango Jello or whiskey with cherry – are also trending.
Furthermore, gourmet additions like edible glitter, fresh fruit garnishes, and even whipped cream toppings elevate the presentation. There’s a growing interest in themed Jello shots, tailored to specific events or holidays. Finally, sugar-free options, utilizing 6 oz sugar-free Jello, cater to health-conscious partygoers, proving Jello shots are adaptable and exciting!

Making Jello from Scratch
While the Jello brand dominates, homemade gelatin desserts are just as easy! Jell-O is simply gelatin mixed with flavoring, readily achievable using unflavored gelatin.
Using Unflavored Gelatin
Gelatin, purchased in its original unflavored form, opens a world of customization for your Jello creations. To replicate a 6 oz Jello package, you’ll need approximately 6 tablespoons of unflavored gelatin powder. This allows complete control over flavor intensity and sweetness levels, moving beyond pre-mixed options. Remember that unflavored gelatin lacks the added sugars and colors found in commercial mixes, requiring you to introduce these elements separately.
Experiment with various fruit juices, purees, or even brewed teas as your flavoring base. Sweeteners like sugar, honey, or artificial alternatives can be adjusted to your preference. This method provides a healthier alternative, allowing you to manage ingredients and tailor the dessert to dietary needs.
Adding Flavorings and Sweeteners
When utilizing unflavored gelatin, the addition of flavorings and sweeteners is crucial for achieving a delightful Jello experience. Fruit juices, like strawberry or grape, provide natural flavors and some sweetness, but often require supplemental sweeteners. Sugar is a classic choice, but honey, maple syrup, or sugar substitutes can be used to adjust the sweetness to your liking.
For a more intense flavor, consider using fruit purees or extracts. Remember that the amount of sweetener needed will depend on the tartness of the flavoring agent. Experimentation is key to finding the perfect balance!
Enhancing Jello with Fruit
Gelatin is healthy as is, but you can make your dessert even healthier by adding fresh fruit into it – sprinkle the gelatin!
Adding Fruit Before Setting
Incorporating fruit before the Jello sets introduces a delightful textural contrast and burst of natural sweetness. Gently fold your chosen fruit – berries, peaches, or even mandarin oranges work wonderfully – into the Jello mixture after it has slightly cooled but before it begins to solidify. This prevents the fruit from sinking entirely to the bottom.
Ensure the fruit pieces are relatively small to distribute them evenly throughout the Jello. Consider lightly coating the fruit in a bit of the Jello liquid to help it suspend better. Remember, some fruits contain enzymes that can interfere with the gelatin setting process, so blanching or pre-cooking certain fruits might be necessary for optimal results.
Layering Jello and Fruit
Creating visually stunning and flavorful Jello desserts is easily achieved through layering! Begin by pouring a base layer of partially set Jello into your chosen container. Once this layer has firmed up slightly, carefully arrange your preferred fruit – grapes, pineapple chunks, or kiwi slices are excellent choices – on top.
Gently pour another layer of Jello over the fruit, ensuring it doesn’t disturb the arrangement. Repeat this process for multiple layers, allowing each layer to partially set before adding the next. This technique showcases the fruit beautifully and provides a delightful variety of textures and tastes in every bite.